This blog post is building on top other posts by me and my
friend Ayman El-Hattab, where in
my post (Published April 9, 2015) I talked about creating master details records with
repeating section in Nintex forms and Nintex Workflow, and how you can parse
the repeating section data and use the information in a workflow “foreach” loop
so you can create items in a separate list.
Ayman’s post (Published: Aug 4, 2015) is about displaying the repeating section data in the
list view in an easy way, which is mainly by creating a custom field type (Nintex
Repeating Section Data). He created two versions 2010 & 2013. But the only problem
with this way is that you will need to deploy this field type first as a farm
solution, which is not an option in some scenarios like O365 and organizations who
do not allow custom server side deployments.
Other than that it is a great and easy to use solution.
Why and What is JSLink
So this is why I build this JSLink to make it easy to deploy
especially for O365, and if you are coming from Nintex side and don’t know what
is JSLink, see this definition:
“
Client-side rendering is a new concept in
SharePoint 2013. It’s provides you with a mechanism that allows you to use your
own output render for a set of controls that are hosted in a SharePoint page (list views,
display, add and Edit forms).
This mechanism enables you to use well-known technologies, such as HTML and
JavaScript, to define the rendering logic of custom and predefined field types.”
- Muawiyah Shannak -
https://code.msdn.microsoft.com/office/Client-side-rendering-JS-2ed3538a
(this link has a very good group of samples). You will also need to check the
samples published on the Office 365 Patterns and Practices
https://github.com/OfficeDev/PnP/tree/master/Samples/Branding.JSLink
where they added some reusable templates.
List Column
Starting by creating a list column of type “Multiple lines
of text” in the list where we have our Nintex form. Make it a “plain text” in
the “type of text to allow”.
Repeating Section
On the form, drag and drop the repeating section and add the
child controls as needed, in my example here I have three text boxes: First
Name, Last Name, and Age as you can see below.
I also named the controls in the same order “First Name”, “Last
Name”, and “Age”. And yes with the space between “First” and “Name” because
this is how I want it to look like in the view.
Then connect the repeating section control to the multiple line
field created in the first step.
The Repeating Section JSLink
Now it is the step where the JSLink will do its magic, I
have three files deployed to the “Site Assets” library located in the root web
in the site collection. (You can choose to upload these files anywhere but
remember to change the URLs in the view web part and in the override JavaScript
file)
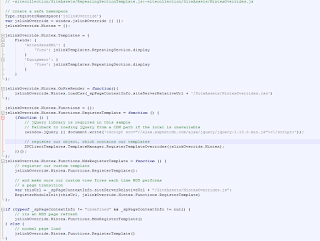
The first file is the “NintexOverrides.js”, and as you can
see below I am using the PnP namespaces, and this file mainly is telling
SharePoint view that we have another rendering template for one or more fields
in the view:
The next file is the “RepeatingSectionTemplate.js”, and I am
using the PnP namespace as well. And the purpose of this file simply is to
parse the repeating section XML and display HTML table instead:
The third file is “NintexOverrides.css” cascading style
sheet to set how we want the table displayed in the view:
Deployment
Actually there is no deployment other than copying the three
files to the site assets library then set the JS Link property by doing the
following steps:
- Browse to the view page
where you want to apply this rendering (the list where the form with the
repeating section is)
- Edit the web part:
- Scroll down to “Miscellaneous”
then add “~sitecollection/SiteAssets/RepeatingSectionTemplate.js|~sitecollection/SiteAssets/NintexOverrides.js”
in the “JS Link” property
- Click “Okay” then save the
page “Stop Editing”
The Output
Now you have the repeating section as follows:
And adding more repeating sections is easy as adding more “Multiple
lines of text” column and connect it to the repeating section control on the
form, then the output will be something like this:
Then update the “NintexOverrides.js” file to list the new
column as follows:
Now the output is like this:
Click
here to download the three files mentioned above.


